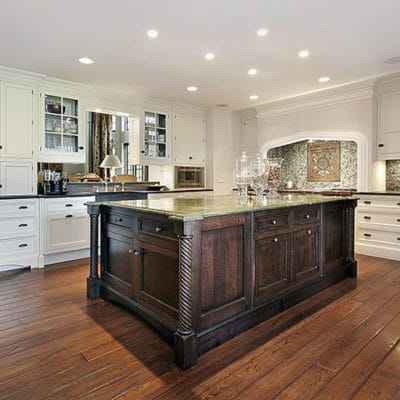
A butcher block countertop installation guide
— September 5, 2020Butcher block countertops are an amazing option for those who want convenience and affordability. These countertops have become even more popular in comparison to other options. For instance, many people prefer them over quartz countertops just because they add a lot of warmth in the kitchen. Overall, we believe that these countertops give a very natural vibe to your kitchen.
But should you really choose butcher block countertops? Are they worth it in the long run? And what should you do to install them? In this article, we discuss all these questions and aim to provide you a concrete answer to them.
Why Choose Butcher Block Countertops?
Butcher block countertops looks absolutely amazing, and they can also be taken as a DIY project. These countertops are very affordable and hence, you will not face a huge loss even if things go wrong.
In fact, many people install new butcher blocks every year. However, these people tend to do it on their own. This is because the installation costs can go up to several thousand dollars. However, if you are able to install them on your own, you will be able to save all these costs.
Now, installation of butcher block countertops is not hard at all. At most, you require some personal protective equipment and a jigsaw along with circular saw. Just do not get way too fancy and make a simple corner with an L shape. And make sure that you are taking enough time in this project because it may take you 2-3 days to get it just right.
To install butcher block countertops in the most efficient manner, use the following tips:
Measurements
First of all, take measurements of the material and make sure that this is done at least several weeks before. Note that you can find many materials of butcher block countertops. However, the walnut stain birch is the most popular among people.
Remove existing top
Before installing a countertop, you must remove the existing one. This is also what any countertop company will do. After fully removing the countertop, you are all set to start working on your new butcher block countertop.
Remove leftover adhesives
The next step is to remove any adhesive that may be left over at the spot from where you have removed the countertop. You may even have to scratch some of the adhesive out. For that, just use a coarse grit paper. This can go quite fast so you need to be careful.
Make cuts
After measurements, use a circular saw to make the first cut. Keep your saw going very slow and keep it steady. Repeat this process for all sections of the countertop, and always check for the accuracy twice.
Secure the top
Finally, lay the butcher block countertop cutting on the top area after putting on some adhesive. Furthermore, you must also use screws to place the countertop. These screw holes must be drilled prior to securing the countertop.
Finish counter
Now, put on some pre stain conditioner on your countertop. Then, after about 20 minutes, apply the stain. Make sure that you are giving it enough drying time for the best results.
Conclusion
Butcher’s block countertops are perhaps the only type of tops that you can install on your own. They do not require enough technical expertise, other than some basic experience with cutting wood. If you have that, then you are all set to be installing your butcher’s block countertop on your own.
Alternatively, you can also talk with countertop replacement companies Potomac and get their assistance in this. This will of course, have its costs.


Leave a reply